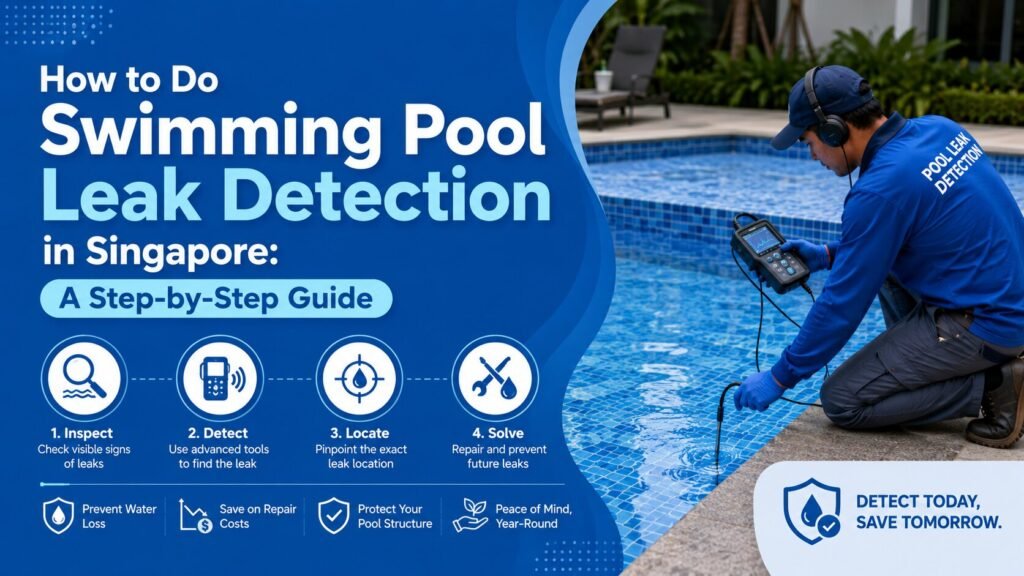
Swimming pool leak detection in Singapore follows a structured sequence: first confirm water loss is real using a bucket test, then isolate whether the leak is in the pool structure or plumbing using systematic inspection and dye testing, then use pressure testing for underground pipe faults and acoustic detection for precise location. Each step narrows the source before the next tool is deployed. Skipping the sequence wastes time and money.
A pool losing water in Singapore is one of the most frustrating problems to deal with because the source is rarely obvious. You know water is disappearing. You cannot see where it is going. The answer is not to guess and start digging. It is to follow a logical detection sequence that eliminates possibilities systematically until the source is confirmed. This guide covers that complete sequence, what you can check yourself, what requires professional tools, and how to interpret what you find at each stage.
Step 1: Confirm the Pool Is Actually Leaking
How do I know if my pool has a leak or if it is just evaporation?
The bucket test separates real water loss from normal evaporation. Fill a bucket with pool water and place it on a pool step so it sits at the same water level as the pool. Mark the water level inside the bucket and on the pool wall. Leave both undisturbed for 24 hours without using the pool. If the pool drops more than the bucket, the pool has a leak beyond evaporation. If both drop equally, the loss is evaporation only. Normal evaporation in Singapore accounts for approximately 2 to 5 mm of water loss per day. Over 24 hours in direct sun with regular usage, expect the pool to lose up to 6 to 8 mm. Anything beyond this warrants investigation.
How to run the bucket test properly:
- Fill a clean plastic bucket with pool water to within 5 cm of the rim
- Place it on the first or second pool step so it sits in the water, not on the pool deck
- Mark the water level inside the bucket with a waterproof marker or tape
- Mark the pool water level on the pool wall at the same time
- Turn off the auto-fill system if your pool has one
- Leave the pool unused for 24 hours
- Compare the drop in the bucket versus the drop in the pool
Interpreting the result:
| Result | Meaning |
| Pool drops same as bucket | Normal evaporation, no leak confirmed |
| Pool drops 5 to 10 mm more than bucket | Minor leak present, investigation warranted |
| Pool drops 15 mm or more beyond bucket | Significant leak, professional detection needed |
| Pool drops much faster with pump running than with pump off | Leak is likely in the plumbing or equipment, not the shell |
That last point is worth noting separately. If your pool loses water faster when the pump is running than when it is switched off, the leak is almost certainly on the pressure side of the plumbing system. If the pool loses water at the same rate regardless of pump operation, the leak is structural or in a gravity-fed line.
Step 2: Visual Inspection of the Pool Structure
A visual inspection checks the pool shell, all visible fittings, the waterline tile area, and the equipment surroundings for obvious signs of water escape. Look for visible cracks in pool walls or floor, efflorescence (white chalky mineral deposits) on pool surfaces, wet or damp soil around the pool edge, staining around fittings and light niches, and any areas where the pool surface coating is blistering or separating.
Walk the entire perimeter of the pool with this checklist:
Pool shell and surfaces
- Look for visible cracks in the pool walls, floor, and step edges
- Note any areas of efflorescence (white chalky streaks) on the pool surfaces, which indicate water has been moving through the concrete
- Check for rust staining on pool walls or floor (indicates steel reinforcement is corroding due to moisture ingress)
- Look for tiles that are hollow-sounding, lifting, or already detached
Waterline area
- The waterline is the most common location for structural leaks because it is the point of maximum thermal movement between wet and dry surfaces
- Check grout joints along the waterline for gaps, cracks, or missing sections
- Look for staining patterns that run downward from the waterline
Skimmer boxes
- The junction between the skimmer body and the pool shell is a common failure point
- Look for cracks where the skimmer throat meets the pool wall
- Check the skimmer basket housing for cracks or separation
Return jets and fittings
- Look for staining or calcium deposits around each return jet, main drain cover, and any other fitting that penetrates the pool shell
- These penetration points are sealed with sealant or putty that degrades over time
Underwater lights
- Light niches are a common leak source. The conduit running from the light niche through the pool wall into the surrounding structure creates a potential water path
- Look for staining around the light fitting and discolouration of the pool surface in the light niche area
Equipment area and plant room
- Check the pump housing, filter body, valve bodies, and all pipe connections for wet marks, mineral deposits, or active drips
- Wet concrete at the base of the equipment pad often indicates a slow equipment-side leak
Step 3: The Dye Test for Fitting and Surface Leaks
A dye test uses a small syringe of coloured dye released near suspected leak points while the pool pump is off. Pool water is still and the dye disperses slowly by diffusion. If the dye is actively pulled toward and into a gap, crack, or fitting, water is escaping at that point. The movement of the dye toward the gap shows the direction of water flow, confirming the leak location. The dye test works best for surface and fitting leaks. It is not effective for underground plumbing faults where the leak is inaccessible from inside the pool.
How to conduct a dye test:
- Turn off the pool pump and wait 15 to 30 minutes for water to become completely still
- Put on a mask and snorkel or use an underwater viewing device
- Position the syringe tip within 2 to 3 cm of the suspected leak point
- Release a small amount of dye slowly and watch what it does
Interpreting dye test results:
- Dye disperses evenly in all directions and does not move toward any gap: no leak at that point
- Dye drifts slowly toward a gap over 10 to 20 seconds: minor water movement, possibly a small leak
- Dye is pulled sharply into a gap within 2 to 5 seconds: active leak at that point, confirmed
Test each suspected location separately. Common test points include:
- All four corners of each skimmer box opening
- Around each return jet face and its perimeter sealant
- Around the main drain cover and its edges
- Around underwater light fittings
- Along visible cracks in the pool shell
- Along grout joints in areas where tiles have previously detached
Document which points show dye movement before calling a professional. This information helps the technician prioritise and speeds up the diagnostic process.
Step 4: Isolating Structural Leaks from Plumbing Leaks
To isolate a structural leak from a plumbing leak, plug all the plumbing lines at the pool fittings and observe the water level over 24 hours. If the pool still loses water with all plumbing isolated, the leak is through the pool shell or a surface fitting. If the pool holds water with plumbing plugged, the leak is in the plumbing lines. This test requires the pump to be off and all lines to be sealed at the pool end. This is a useful intermediate test that a pool professional can conduct before deploying pressure testing equipment.
The plugging test method:
Most pool fitting openings accept rubber expansion plugs that can be inserted and tightened by hand to seal the line. A professional carries a set of these in standard pool fitting sizes (50 mm, 63 mm, 75 mm are the most common in Singapore residential pools). With all fittings plugged and the pump off, the pool water level is marked. After 24 hours, the water level is checked.
| Result | Interpretation |
| Pool level holds with all lines plugged | Leak is in the plumbing lines, not the pool shell |
| Pool still drops with all lines plugged | Leak is structural (through shell, fitting penetrations, or waterproofing) |
| Pool drops faster in one area | Leak may be localised to one section of the pool wall or floor |
This test narrows the scope significantly. If the pool holds water with plumbing plugged, the next step is pressure testing the plumbing lines to identify which one is at fault.
Step 5: Pressure Testing for Underground Plumbing Leaks
Pressure testing is used when the pool is confirmed to be losing water through the plumbing lines rather than the shell. Each pipe line is isolated, sealed, and pressurised with air or water to a standard test pressure. A calibrated gauge monitors the pressure over an observation period. A stable reading means the line is intact. A pressure drop confirms a leak in that specific line. This method finds underground pipe faults without excavation.
This is professional-level work that requires calibrated pressure gauges, correct test plugs for each fitting type, and knowledge of appropriate test pressures for UPVC pool plumbing (typically 10 to 15 PSI in Singapore residential pools). For the full explanation of how pressure testing works in detail, see our dedicated blog: How Professional Pool Pressure Testing Works in Singapore.
The key outputs from pressure testing:
- Which specific pipe line is losing pressure (suction line, return line, backwash line, feature lines)
- The severity of the leak based on the rate of pressure drop
- Confirmation that lines not showing pressure loss are intact
Step 6: Acoustic Detection for Precise Fault Location
Once pressure testing confirms which pipe line has a leak, acoustic detection equipment is used to pinpoint the fault location along that pipe run without excavation. A sensitive microphone sensor is moved along the ground above the pipe route. Escaping air or water creates a distinct sound signature through the soil and concrete. The signal is strongest directly above the fault, allowing the location to be marked to within approximately 0.5 to 1 metre before any digging begins.
This step transforms a confirmed diagnosis (“the suction line is leaking”) into an actionable repair plan (“the leak is approximately 1.2 metres from the skimmer, 0.4 metres depth”). Without acoustic detection, locating an underground pipe fault means either excavating along the full pipe route (expensive and disruptive) or using the pressure test result plus knowledge of the pipe routing to make an educated guess about the fault location. Most professional leak detection visits in Singapore include acoustic detection as part of the underground fault diagnosis.
Step 7: Thermal Imaging for Structural Water Movement
Thermal imaging detects temperature differences in pool walls and floors caused by water moving through the structure. Water escaping from behind a pool surface creates a temperature anomaly visible to an infrared camera. This method is used when structural leaks are suspected but not visually confirmed, particularly in pools where waterproofing membrane failure is causing slow water migration through the concrete shell without an obvious surface crack.
Thermal imaging is most effective when:
- The pool has been leaking for some time and water has been migrating through the shell
- The pool surface shows efflorescence but no visible crack explains it
- The bucket test confirms loss beyond evaporation but dye testing at fittings has not found the source
- The pool is a penthouse or rooftop pool where moisture appearing below suggests water is moving vertically through the pool structure
This tool is used by professionals with an infrared camera. It is not a DIY option.
Matching the Leak Source to the Right Repair
Once the source is confirmed, the repair approach follows logically:
| Leak Source | Repair Required |
| Skimmer body cracked or separated from shell | Skimmer replacement or skimmer-to-shell joint reseal |
| Return jet or fitting seal failure | Fitting reseal or fitting replacement |
| Pool shell hairline crack | Crack injection or patching |
| Waterproofing membrane failure | Full or targeted waterproofing repair with tile removal |
| Underground pipe fracture or joint failure | Excavation at fault location, pipe section replacement |
| Equipment-side plumbing leak (pump, filter, valves) | Seal or fitting replacement at equipment |
| Light niche conduit leak | Conduit resealing or replacement |
Each repair type has a different cost range and timeline. Matching the right repair to the confirmed source prevents wasted money on fixes that do not address the actual problem. For the full repair service details, see our Pool Leak Detection & Repair Singapore page.
What You Can Do Yourself vs What Requires a Professional
Homeowners can reliably conduct the bucket test to confirm water loss, run the pump-on vs pump-off comparison to indicate structural vs plumbing source, visually inspect the pool shell and fittings for obvious cracks and staining, and conduct basic dye testing at accessible fitting locations. Pressure testing, acoustic detection, thermal imaging, and the plumbing plugging test all require professional equipment and expertise.
| Step | DIY Possible | Professional Required |
| Bucket test | Yes | No |
| Pump-on vs pump-off comparison | Yes | No |
| Visual inspection of shell and fittings | Yes | No |
| Basic dye testing at visible fittings | Yes (with syringe kit) | No |
| Plumbing line plugging test | Possible with correct plugs | Recommended |
| Pressure testing | No | Yes |
| Acoustic detection | No | Yes |
| Thermal imaging | No | Yes |
| Written diagnostic report | No | Yes |
The DIY steps are useful for gathering information before calling a professional. They narrow the scope, give the technician a head start, and help you have a more informed conversation about what the detection visit found and what needs to be repaired.
Singapore-Specific Leak Causes Worth Knowing
Pool leaks in Singapore have specific contributing factors that differ from pools in cooler, drier climates.
Thermal cycling at the waterline Singapore’s daily temperature swing between roughly 23°C at night and 34°C during the day causes the pool structure to expand and contract constantly. Over years, this thermal movement concentrates stress at the waterline where wet and dry surfaces meet. Waterline grout joints and the skimmer-to-shell junction are common early failure points for this reason.
Heavy rainfall and soil movement Singapore receives over 2,300 mm of rainfall per year. Sustained heavy rain saturates the soil around pool structures, causing settlement and lateral movement. Underground pipe joints are particularly vulnerable to soil movement stress. This is one reason underground plumbing leaks are more common in Singapore pools than in drier climates.
Tree root intrusion Landed properties with mature trees near the pool are at higher risk of underground pipe fracture from root intrusion. Tree roots follow water, and pool plumbing lines are a reliable water source. Roots apply progressive pressure to pipe walls and joints until they fracture. Acoustic detection during pressure testing often reveals the sound of root interference alongside the escaping water or air.
Pool age and original construction quality Many landed home pools in Singapore were built 15 to 25 years ago using construction standards that have since been updated. Sealants around fittings, grout compounds, and waterproofing materials from that era have lower chemical and UV resistance than modern equivalents. Pools of this age with no documented renovation or repair history frequently show multiple leak sources simultaneously.
When to Call a Professional
If your bucket test shows the pool is losing water beyond evaporation and your visual inspection and dye testing have not confirmed a specific surface source, the leak is most likely underground or behind the pool surface. Both of these require professional detection equipment. Do not continue to top up the pool water indefinitely while a leak is ongoing. Every day the pool loses water through an underground plumbing fault, the surrounding soil is being saturated and the structural ground support around the pool is being progressively undermined. The repair cost grows with time.
At Infinity Pool Services, we carry out full leak detection visits across Singapore using the complete toolset: bucket test baseline, visual inspection, dye testing, plumbing isolation, pressure testing, acoustic detection, and thermal imaging where indicated. You receive a written diagnostic report before any repair cost is committed. Book a Leak Detection or call +65 8301 9006
Related Reading and Services
- Pool Leak Detection & Repair Singapore — Full professional service details and what a detection visit covers
- Swimming Pool Leak Detection — Our leak detection service page
- How Professional Pool Pressure Testing Works in Singapore — Deep dive into the pressure testing methodology
- Pool Waterproofing Singapore — When the leak source is the waterproofing membrane
- How Waterproofing Protects Your Pool from Leaks and Tile Damage — Understanding structural vs waterproofing leak sources
- Pool Repair & Renovation Singapore — When leak detection leads to broader structural repair needs
- Swimming Pool Plumbing Repair — Plumbing repair after underground fault is confirmed
- How to Spot and Fix Leaks in Your Pool in Singapore — Companion blog with homeowner-focused leak spotting tips
- Pool Waterproofing vs Regrouting: What Is the Difference? — When waterproofing failure rather than a fitting leak is the source
- Common Swimming Pool Problems in Singapore Homes — Broader context on pool problems and their causes
Frequently Asked Questions
How do I know if my pool has a leak?
Run a bucket test: place a water-filled bucket on a pool step with the water level matching the pool. Mark both levels and check after 24 hours without using the pool. If the pool drops more than the bucket, you have a leak beyond normal evaporation. A drop of more than 10 mm beyond the bucket level confirms a significant leak needing investigation.
What is the first step in pool leak detection?
The bucket test is always the first step. It confirms whether real water loss is occurring beyond normal evaporation and establishes a baseline before any other detection work begins. Without this baseline, you cannot quantify the severity of the leak or track whether repairs have resolved it.
How do professionals detect pool leaks in Singapore?
Professionals use a structured sequence: visual inspection of the pool shell and fittings, dye testing at suspected surface leak points, plumbing isolation to separate structural from plumbing leaks, pressure testing on each plumbing line to identify faults, acoustic detection to locate underground faults precisely, and thermal imaging for structural water movement. Each step narrows the source before the next is deployed.
Can I detect a pool leak myself?
You can confirm water loss with a bucket test, conduct a visual inspection for obvious cracks and staining, and do basic dye testing at visible fittings. These steps are useful for gathering information before calling a professional. Pressure testing, acoustic detection, and thermal imaging require professional equipment and cannot be done reliably without it.
How much does pool leak detection cost in Singapore?
A professional pool leak detection visit in Singapore typically costs SGD 150 to SGD 450 depending on pool size, complexity of the plumbing system, and which detection methods are used. This covers the detection and a written diagnostic report. Repair costs are quoted separately based on what the detection finds.
How long does pool leak detection take?
A complete professional leak detection visit on a standard residential pool in Singapore takes 2 to 4 hours. This includes the visual inspection, dye testing at all fittings, plumbing isolation, pressure testing of each line, and acoustic detection on any lines that fail the pressure test. A written report is typically produced the same day.
Does the pool need to be drained for leak detection?
Not initially. Most leak detection work is carried out with the pool filled, using dye testing, pressure testing, and acoustic detection. Draining is only required if the leak source is confirmed to be in an area that needs to be exposed for visual inspection or repair, such as the pool floor or lower wall.
What causes pool leaks in Singapore specifically?
Common causes in Singapore include waterline grout and fitting sealant failure from daily thermal cycling, soil movement from heavy rainfall causing underground pipe joint stress, tree root intrusion into plumbing lines on landed properties, waterproofing membrane degradation from UV and chemical exposure, and age-related failure of seals and fittings in pools over 10 to 15 years old.
How fast can a pool leak waste water in Singapore?
A moderate leak losing 15 to 20 mm of water per day in a standard 50,000-litre pool wastes approximately 750 to 1,000 litres of treated, chemically balanced pool water daily. Over a month, this is 22,000 to 30,000 litres. At PUB water rates, the water cost alone is significant, aside from the chemical cost of constantly re-treating the replacement water.
What should I do if my pool keeps losing water after a repair?
A pool that continues losing water after a repair was carried out suggests either the repair did not fully address the identified fault, or a second leak source was not identified during detection. Book a follow-up detection visit. A reputable contractor will review the prior repair and conduct fresh detection to identify any remaining or new leak sources.