
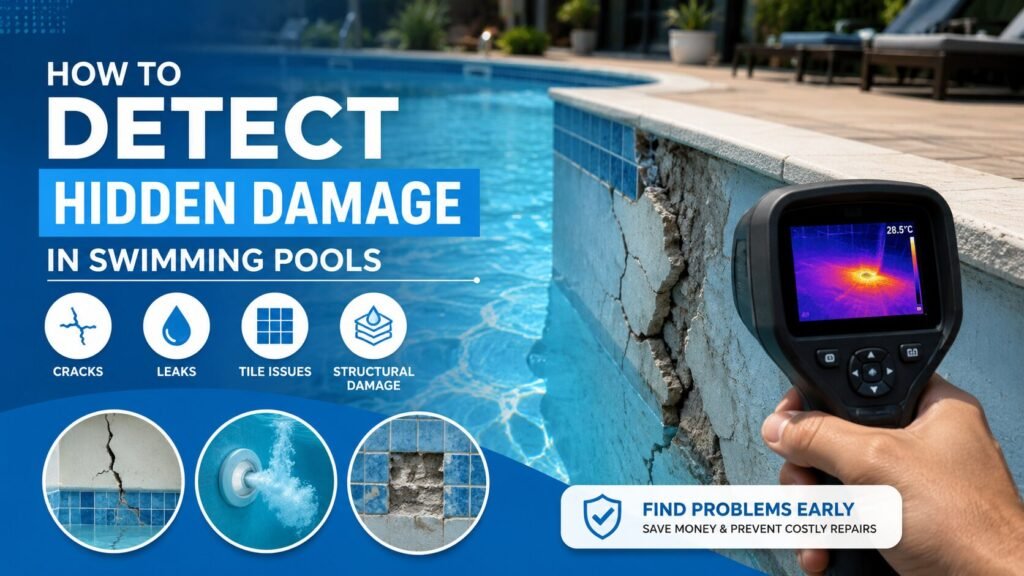
Hidden damage in a swimming pool includes waterproofing membrane failure beneath the tiles, tile adhesive loss that has not yet caused tiles to detach, underground plumbing cracks, structural shell fractures invisible from the surface, and early-stage fitting seal degradation. These are detected through the tap test for tile bond condition, a bucket test for water loss quantification, dye testing at fittings, pressure testing of plumbing lines, and professional thermal imaging for water movement behind pool surfaces. The most expensive pool repairs in Singapore are the ones that were hidden for too long.
A fitting seal that costs SGD 200 to fix when caught early costs SGD 15,000 when it is left long enough to allow waterproofing failure behind the pool walls. An underground pipe fracture that costs SGD 800 to repair becomes a SGD 4,000 job after months of soil erosion around the pipe. Hidden damage is not invisible. It leaves signs. Knowing what to look for, and which tools professionals use to find what you cannot see, helps you catch problems before they compound.
Why Pool Damage Hides So Effectively
Pool damage hides because the most critical structural layers are beneath the visible surface. The waterproofing membrane sits under the tiles. The tile adhesive bed is between the tile and the substrate. Underground plumbing runs a metre or more below the pool deck. None of these are visible during normal pool use. By the time damage to these layers produces a visible symptom, the underlying problem has usually been progressing for 12 to 24 months.
Pool surfaces also work against early detection. A pool that looks pristine from above can have widespread adhesive failure across the floor, a waterproofing membrane that has delaminated in multiple areas, or an underground pipe that has been slowly leaking into the surrounding soil for a year.
The visible surface, the water colour, the tile appearance from above, tells you almost nothing about the structural condition beneath. This is why professional inspection techniques that go beneath the surface are the only reliable way to detect hidden damage early.
Type 1: Hidden Tile Adhesive Failure
Tile adhesive failure that has not yet caused tiles to detach is detected by the tap test. Tap each tile firmly across all pool surfaces using a hard object such as a coin or the handle of a screwdriver. A properly bonded tile produces a solid, flat sound. A tile that has separated from its adhesive bed, even if it has not yet fallen off, produces a noticeably higher-pitched, hollow echo. Mapping where hollow tiles occur across the pool tells you which areas have lost adhesive bond and what the extent of the problem is.
This test sounds simple and it is. But it is one of the most valuable diagnostic tools in pool inspection.
The hollow sound means there is a void between the tile back and the substrate. The tile is held in place by residual friction and gravity, not by adhesive. In Singapore’s heat, the next cycle of thermal expansion and contraction is likely to release it.
How to run a systematic tap test:
Start at one corner of the pool and work methodically across every tile in each section: walls, floor, steps, and the waterline area separately. Tap each tile individually. Mark hollow tiles with chalk or a sticky note on the pool coping above them. When you have covered all surfaces, step back and look at the pattern.
What the pattern tells you:
Isolated hollow tiles in one location: localised adhesive failure, possibly from a grout joint that failed in that area and let water in. Targeted repair may be sufficient.
Hollow tiles scattered across multiple sections of walls and floor: the adhesive has failed broadly. This almost always means the waterproofing membrane beneath has been failing and water has been systematically undermining the adhesive across the pool. A broader scope is required.
Hollow tiles concentrated along the waterline specifically: the waterline area experiences the highest thermal cycling stress in Singapore pools. Early waterproofing or adhesive failure often appears here first before spreading downward.
Type 2: Hidden Waterproofing Membrane Failure
Waterproofing membrane failure that has not yet caused visible tile detachment is detected through a combination of the bucket test for water loss quantification, the pump-on versus pump-off comparison to distinguish structural from plumbing leaks, efflorescence inspection on pool surfaces, and dye testing at all fitting penetrations. When the bucket test confirms water loss beyond evaporation and no specific fitting or plumbing fault explains it, the waterproofing membrane is the most likely source.
The bucket test for waterproofing assessment:
Place a water-filled bucket on the first pool step at the same water level as the pool. Mark both levels simultaneously. Leave the pool unused for 24 hours with the pump off and the auto-fill disconnected. Check both levels.
Normal evaporation in Singapore: 2 to 5 mm per 24 hours.
If the pool drops 10 to 20 mm beyond the bucket level: significant water loss is occurring through the structure. The waterproofing membrane is the most likely source if no specific fitting or plumbing fault has been confirmed.
If the pool drops at the same rate as the bucket: water loss is from evaporation only. No structural leak is currently present.
Efflorescence as a waterproofing indicator:
Look closely at the pool floor and lower walls while the pool is in use, or at the pool shell surface when drained. White or grey chalky mineral deposits forming linear or patch patterns on the surface are efflorescence. They form when water carries dissolved minerals through the concrete as it moves outward through the shell. Efflorescence in a pool that has tiles on the surface means water is moving through the concrete beneath the tiles. The waterproofing layer is not stopping it.
For a detailed explanation of how waterproofing failure progresses, See Our Blog: How Waterproofing Protects Your Pool from Leaks and Tile Damage.
Type 3: Hidden Structural Cracks
Structural cracks in the pool shell that are hidden beneath tiles are detected by professional dye testing at suspected weak points, thermal imaging of pool surfaces looking for temperature anomalies caused by water movement through the concrete, and visual inspection of the bare pool shell after tile removal. Some structural cracks are visible when the pool is drained and the tiles are removed, even if they were completely hidden with tiles in place. Any crack that has penetrated through the full depth of the concrete shell is a structural crack.
What to look for before tile removal:
Hairline cracks in the tile or grout surface running in a consistent direction (rather than random pattern) can indicate a structural crack in the concrete beneath following the same line. Tiles that crack along a straight line without impact damage are often following an underlying structural crack.
Linear efflorescence patterns that run in a consistent direction rather than appearing as diffuse patches also suggest water is tracking along a structural crack beneath the surface.
After tile removal:
Once tiles are removed during renovation, the structural condition of the pool shell is directly visible. All crack patterns, their width, depth, and direction, are assessed before any waterproofing work begins. Active cracks (those still moving due to ongoing ground settlement) require polyurethane injection that remains flexible. Dormant cracks (from historic movement that has stabilised) require epoxy injection that cures rigid. Both types must be repaired before any waterproofing membrane is applied.
Type 4: Hidden Underground Plumbing Faults
Underground pool pipe faults are detected using a two-stage professional approach: first, pressure testing isolates which plumbing line is losing pressure, then acoustic listening equipment is used to locate the specific fault point along that pipe run. The pressure test identifies which line has a leak. The acoustic detector narrows the fault location to within approximately 0.5 to 1 metre along the underground run without breaking any surface. Only then is targeted excavation carried out at the confirmed location.
Signs that point to a hidden underground plumbing fault:
Pool loses water consistently beyond evaporation but no fitting leak is found by dye testing. The pool loses water faster when the pump is running than when it is off. Air bubbles appear in the return jets during pump operation. Soft or wet ground develops near the pool perimeter without surface water to explain it.
Any of these signs warrants professional pressure testing. See our detailed guide on the process: How Professional Pool Pressure Testing Works in Singapore.
What pool owners can assess themselves:
The pump-on versus pump-off water level comparison is something any pool owner can do. Run the pump normally for 24 hours and mark the water level. Then switch the pump off, plug the fittings if possible, and mark the water level again for 24 hours. If the pool loses significantly more water with the pump running, the leak is on the pressure side of the plumbing, meaning the pipe between the pump and the return jets. If the loss rate is similar in both conditions, the leak is structural, through the shell or a fitting.
Type 5: Hidden Fitting Seal Degradation
Fitting seal degradation that has not yet produced visible leakage is detected by dye testing at each fitting while the pool pump is off and the water is still. A small amount of coloured dye is released within 2 to 3 cm of each fitting including skimmer openings, return jets, main drain covers, light niches, and any other penetration point. If the dye is pulled into the gap around the fitting within a few seconds, water is escaping at that point even though it may not be visibly dripping.
This is the standard professional method for fitting leak diagnosis during a leak detection visit. It is precise, non-invasive, and works for any fitting where the water at the fitting face is accessible.
What pool owners can look for without professional equipment:
Staining or discolouration around specific fittings that differs from the surrounding tile area. Calcium or mineral deposits forming a pattern that radiates outward from a fitting edge. These mineral trails form when water carrying dissolved minerals escapes through a micro-gap in the sealant and deposits minerals on the tile surface as it evaporates in Singapore’s heat.
Check each fitting visually after the pool has been in service for several years, particularly skimmer boxes where the junction between the skimmer body and the pool shell is a common early failure point.
Type 6: Hidden Equipment-Side Damage
Hidden damage in pool equipment is detected by systematic inspection of all equipment in the plant room. Look for wet marks, mineral deposits, and rust staining around pump housings, filter bodies, valve bodies, and all pipe unions and fittings. A damp concrete floor at the base of the equipment pad with no obvious dripping source often indicates a slow equipment-side leak. Reduced pump flow rate with clean filter media points to a failing pump impeller or a suction-side air leak.
Most equipment-side damage is detectable before failure if the plant room is inspected regularly rather than only when something stops working.
The inspection checklist for the plant room:
Look at the pump housing for rust staining, surface corrosion, and mineral deposit patterns around the seal area. Run your hand along the underside of the pump and filter housing: a damp surface where none should be means slow leakage. Check all unions and valve bodies for hairline cracks, particularly those made of older PVC that may have become brittle. Look at the pressure gauge: a pump that never reaches its normal operating pressure may be losing water through a suction-side fault.
Salt cell inspection is particularly important in salt chlorination pools. Remove and visually inspect the cell every 3 to 6 months. Heavy white scale on the plates means a cleaning cycle is overdue. Visually thin or eroded plates mean the cell is approaching end of life and will produce insufficient chlorine soon, leading to a pool that goes green despite appearing to run normally.
For equipment servicing, See Our Filter Servicing and Replacement service page and Swimming Pool Pump Repair and Replacement service page.
Professional Detection Tools That Find What Owners Cannot
Even a thorough owner inspection has limits. Certain hidden damage types require professional equipment to detect reliably. Professional pool inspection tools include calibrated pressure testing equipment to identify underground plumbing faults, acoustic listening devices to locate fault points along buried pipes, thermal imaging cameras to detect temperature anomalies caused by water movement behind pool surfaces, dye injection syringes for precise fitting leak testing, and moisture meters for assessing moisture levels in pool surrounds and plant room structures. None of these can be replicated with standard DIY tools.
Thermal imaging: An infrared camera scans pool surfaces and detects temperature differences caused by water moving through the concrete structure. Areas where water is migrating outward through the shell show as cooler patches relative to the surrounding dry concrete. This method is particularly effective for identifying structural water movement when no specific crack or fault is visible on the tile surface.
Acoustic detection: A sensitive microphone sensor moved along the ground above underground pipe routes detects the distinctive sound signature of water or pressurised air escaping through a pipe fracture or joint gap. The signal strength peaks directly above the fault, allowing fault location before any excavation occurs.
Calibrated pressure gauges: Professional pressure testing uses gauges calibrated to an accuracy of 0.1 to 0.2 PSI. This precision allows even very slow pressure drops, indicating small or pinhole-size pipe faults, to be detected during an observation period of 15 to 30 minutes.
When to Call a Professional Inspection
A professional pool inspection is warranted when:
- The pool shows water loss beyond normal evaporation but no obvious source has been identified
- Tiles are hollow in multiple areas on a tap test
- Efflorescence appears on pool surfaces
- The pump loses prime repeatedly or air bubbles appear in return jets
- Soft or wet ground develops near the pool with no surface water explanation
- The pool is over 8 years old without a documented professional inspection
- A previous repair did not hold and the same problem has returned
- You are planning a renovation and want to confirm the full scope of structural work needed
At Infinity Pool Services, we carry out full structural and condition inspections for residential and condo pool owners across Singapore. We use tap testing, bucket testing, dye testing, pressure testing, and acoustic detection to produce a complete picture of the pool’s condition. You receive a written inspection report covering all findings before any repair scope or cost is proposed. We serve Bukit Timah, Sentosa Cove, Tanglin, Novena, Serangoon Gardens and Katong East Coast. Visit Our Homepage to see all the services we provide.
Book a Full Pool Inspection: infinitypool.com.sg/contact or call: +65 8301 9006
Frequently Asked Questions: Detecting Hidden Pool Damage
How do you find hidden damage in a swimming pool?
Hidden pool damage is found through systematic assessment: tap testing all tiled surfaces for hollow-sounding tiles indicating adhesive loss, a bucket test to quantify water loss beyond evaporation, dye testing at all fittings to identify seal failures, professional pressure testing of plumbing lines for underground pipe faults, visual inspection of the plant room for equipment-side leaks, and thermal imaging for structural water movement behind pool surfaces.
What is the tap test and how does it work?
The tap test involves tapping every pool tile firmly with a hard object and listening to the sound. A solid, properly bonded tile produces a flat, dense thud. A tile that has separated from its adhesive bed produces a higher-pitched, hollow echo. Mapping which tiles sound hollow across all pool surfaces shows where adhesive failure has occurred and how widespread it is, even before any tile has physically detached.
How do I know if my pool has hidden waterproofing failure?
Run a bucket test to confirm water loss beyond evaporation. Then do a pump-on versus pump-off comparison to determine whether loss is higher with the pump running (suggesting plumbing) or consistent regardless of pump operation (suggesting structural). Look for efflorescence on pool surfaces. If the bucket test confirms loss and no specific fitting or plumbing fault is found, the waterproofing membrane is the most likely source.
Can pool tiles hide structural damage underneath?
Yes. Pool tiles can look visually perfect from above while the adhesive beneath them has completely failed, the waterproofing membrane below the adhesive has delaminated, and even structural cracks in the concrete shell have developed. The tile face is not a reliable indicator of structural condition. Only a tap test, water loss assessment, and where necessary tile removal for direct shell inspection reveals what is actually happening beneath.
How do professionals find underground pool pipe leaks?
First, each plumbing line is pressure tested in isolation to confirm which line is losing pressure. Then acoustic detection equipment is moved along the ground surface above the pipe route to locate the fault point by sound. The escaping water or pressurised air produces a distinctive acoustic signature that peaks directly above the fault location, allowing precise identification before any excavation.
What is efflorescence and what does it mean for a pool?
Efflorescence is the white or grey chalky mineral deposit that forms on pool surfaces when water carries dissolved minerals through concrete as it migrates outward through the shell. In a pool with tiles, efflorescence visible on tile surfaces or grout joints means water is moving through the concrete beneath the tiles. The waterproofing layer is not stopping it. This is a direct indicator of waterproofing membrane failure.
How often should a Singapore pool be professionally inspected for hidden damage?
A professional structural inspection every 3 to 5 years is prudent for pools in Singapore given the accelerated deterioration rates from heat, UV, and rainfall. Pools over 8 years old without a documented inspection should be assessed as a priority. Any time a pool shows unexplained water loss, hollow tiles, equipment issues, or repeated repair failures, an inspection should be scheduled promptly rather than waiting for the next routine interval.
What professional tools are used to detect hidden pool damage?
Professional tools include calibrated pressure gauges for plumbing fault identification, acoustic listening devices for underground pipe fault location, thermal imaging cameras for detecting water movement behind pool surfaces, dye injection syringes for precise fitting leak testing, and moisture meters for assessing plant room and surround structures. None of these can be replaced by standard DIY inspection.
Can hidden pool damage be detected without draining the pool?
Most hidden damage can be assessed with the pool filled. The tap test, bucket test, pump-on versus pump-off comparison, dye testing, pressure testing, and thermal imaging all work with the pool in normal service. Draining is required only for direct visual inspection of the pool shell after tile removal, and for any repair work that requires a dry substrate.
What should I do if I find hidden damage in my pool?
Document the findings with photos where possible. Note the location and extent of any hollow tiles, any efflorescence, and any water loss measurements from the bucket test. Contact a professional pool contractor for a formal inspection and written assessment. Do not wait for tiles to start falling off before acting. The cost of repair increases significantly as hidden damage progresses from early adhesive loss to waterproofing failure to structural damage.